")
This article contains affiliate links. If you buy through them, SmartHomeDock earns a small commission at no extra cost to you.
Your Google Nest thermostat is showing a low battery warning, and you’ve pulled it off the wall looking for a battery compartment that isn’t there.
If you are wondering how to replace batteries in a Google Nest thermostat, it’s essential to know that most models do not have replaceable batteries.
However, understanding how to replace batteries in a Google Nest thermostat can help you identify the right steps for the models that do allow for battery replacement.
That’s because most Nest thermostats don’t have replaceable batteries; they charge via USB instead. Trying to replace a battery that doesn’t exist is the most common Nest battery mistake.
Before following any steps, identify your model. The fix is completely different depending on which thermostat you have.
Quick Answer — How to Replace Batteries in Google Nest Thermostat:
Nest Thermostat (2020, square): Pull the display off the base. Remove the two AAA batteries from the back of the display. Insert two fresh AAA alkaline batteries. Reattach. Done.
Nest Learning Thermostat (2nd, 3rd gen) and Nest Thermostat E: No replaceable batteries. Pull the display off the wall. Plug a USB cable (micro-USB for 3rd gen and E, USB-C for 4th gen) into the port on the back. Charge from a phone charger for 30–60 minutes. Reattach.
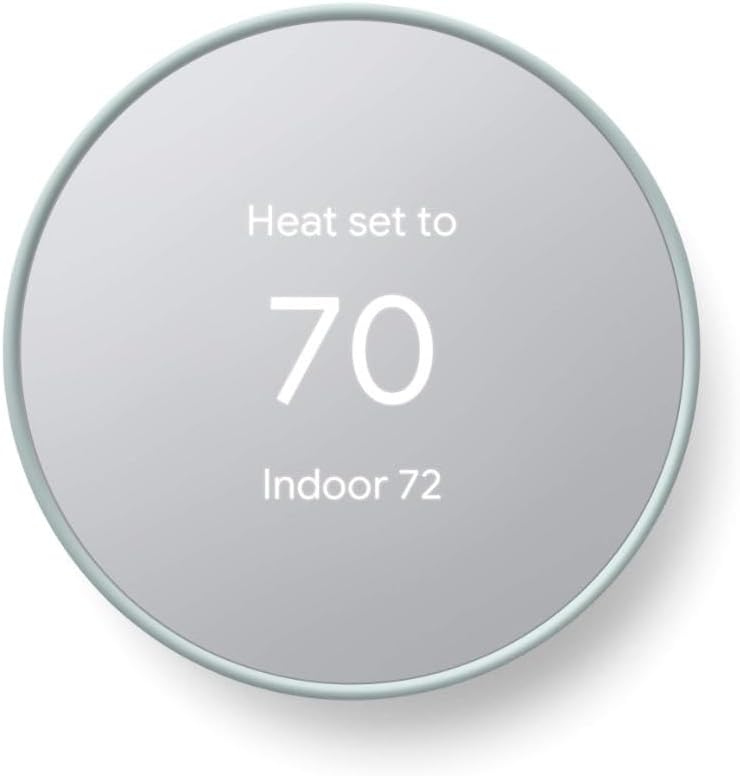
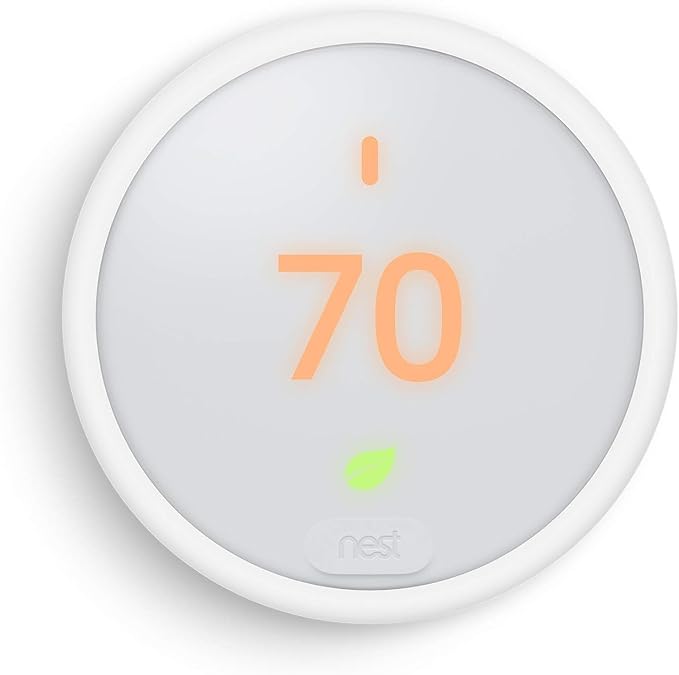
Not sure which model you have? The Nest Thermostat (2020) is square with rounded corners. The Nest Learning Thermostat is round with a stainless steel ring. The Nest Thermostat E is round with a frosted white face. See the model identification section below.
For the Nest Thermostat (2020), follow the guidelines on how to replace batteries in Google Nest thermostat carefully to avoid any issues.
To clarify, knowing how to replace batteries in Google Nest thermostat is crucial for those with the 2020 model that does support battery replacement. When you learn how to replace batteries in Google Nest thermostat, you ensure your device runs smoothly without interruptions.
Step 0: Identify Your Nest Thermostat Model Before Anything Else
Knowing how to replace batteries in Google Nest thermostat will help you avoid unnecessary service calls.
Mastering how to replace batteries in Google Nest thermostat leads to a more convenient home experience.
When it comes to knowing how to replace batteries in Google Nest thermostat, being informed is your best strategy.
This is the most important step. The battery fix is entirely different depending on your model. Get this wrong, and you’ll waste time looking for a battery compartment that doesn’t exist.
⚠️ If you have a Nest Learning Thermostat 1st or 2nd Gen: read this first
Google ended software support for the 1st and 2nd generation Nest Learning Thermostat on October 25, 2025. These models no longer work with the Google Home app or Google Assistant. The thermostat still functions as a basic manual thermostat, you can adjust temperature directly on the device, but remote access, scheduling via app, and all smart features are gone. Charging the battery on these models restores the display only. It will not restore app control or smart functionality. If you have a 1st or 2nd gen and want smart thermostat features again, replacement with the Nest Learning Thermostat 4th Gen is the correct path. See our best smart thermostats guide.
| Model | Released | Shape | Battery type | Support status | Fix |
|---|---|---|---|---|---|
| Nest Learning Thermostat (4th gen) | 2024 | Round, full-colour display, metal ring | Internal rechargeable — USB-C ⚡ | ✅ Fully supported | Charge via USB-C |
| Nest Thermostat (2020) | 2020 | Square, rounded corners, colour display | 2x AAA alkaline — replaceable ✅ | ✅ Fully supported | Replace batteries |
| Nest Learning Thermostat (3rd gen) | 2015 | Round, stainless steel ring, colour display | Internal rechargeable — micro-USB ⚡ | ✅ Still supported | Charge via micro-USB |
| Nest Thermostat E | 2017 | Round, frosted white face, smaller display | Internal rechargeable — micro-USB ⚡ | ✅ Still supported | Charge via micro-USB |
| Nest Learning Thermostat (1st & 2nd gen) | 2011–2014 | Round, stainless steel ring | Internal rechargeable — micro-USB ⚡ | ❌ App support ended Oct 2025 | Charge via micro-USB (manual use only) |
Not sure which model you have? Open the Google Home app. Tap your thermostat device. Tap the settings icon. Scroll to Device information, and the model number is listed there.
Alternatively, pull the thermostat display off the wall. The model number is printed on a label on the back of the display.
Google Nest Thermostat Battery Replacement: Nest Thermostat (2020)
The Nest Thermostat (2020) is the only current Nest model with user-replaceable batteries. Here’s how to replace them.
What you need
Always be mindful of how to replace batteries in Google Nest thermostat, because this knowledge is vital for troubleshooting.
- Two AAA alkaline batteries — Duracell or Energizer recommended
- No tools required
Understanding how to replace batteries in Google Nest thermostat will ensure you are never stuck with a dead device.
⚠️ Use standard alkaline batteries only. Do not use rechargeable NiMH batteries. Rechargeable AAA batteries deliver 1.2V versus alkaline’s 1.5V; the lower voltage can cause premature low-battery warnings and display instability. Do not use lithium AA batteries.
Steps to replace the batteries in the Nest Thermostat (2020)
- Pull the display off the base. Grip the thermostat display with both hands and pull directly away from the wall. It detaches from the wall plate with a gentle pull — no screws, no tools.
- Locate the battery compartment. On the back of the display, you’ll see two AAA batteries sitting in a compartment. If you see a USB port instead of batteries, you have a different model — see the charging section below.
- Remove the old batteries. Slide or press them out of the compartment. Note the orientation — positive (+ end) toward the spring contact on each slot.
- Check the battery contacts. Look for any corrosion (white or greenish residue) or debris. Clean with a dry cloth if needed. If you received a low battery alert immediately after setup, check for any remaining piece of the plastic battery pull tab — this sometimes stays stuck on the contacts and causes a false low-battery reading.
- Insert the new batteries. Orient each battery with the positive (+) end toward the spring contact. Press firmly until each battery seats fully.
- Reattach the display. Align the bottom of the display with the wall plate connector and press firmly until it clicks. The display should power on within 10–15 seconds.
- Confirm in the app. The battery warning should clear in the Google Home app within a few minutes of the thermostat reconnecting to Wi-Fi.
What type of batteries does the Nest Thermostat 2020 use?
The Nest Thermostat (2020) uses 2x AAA 1.5V alkaline batteries.
Do not use rechargeable batteries; they provide lower voltage and drain faster in this application. Duracell CopperTop and Energizer MAX are both confirmed compatible.
How long do Nest Thermostat batteries last?
When you understand how to replace batteries in Google Nest thermostat, you can effectively manage your home’s temperature settings.
Under normal conditions, the AAA batteries in a Nest Thermostat (2020) last approximately 1–2 years.
Battery life shortens if your HVAC system doesn’t provide a C-wire; the thermostat draws more from the backup batteries to supplement power.
If batteries drain in under 6 months, see the repeated low battery section below.
How to Charge a Nest Thermostat (Learning Thermostat and Thermostat E)
The Nest Learning Thermostat (2nd, 3rd, and 4th generation) and Nest Thermostat E have no replaceable batteries.
By practicing how to replace batteries in Google Nest thermostat regularly, you maintain the efficiency of your device.
They use an internal rechargeable lithium battery that charges via USB. This is not a design flaw; it’s intentional.
The battery is designed to last the lifetime of the device under normal HVAC-powered operation.
If you’re seeing a low battery alert on these models, the HVAC system isn’t delivering enough power, either temporarily (power outage, breaker trip) or persistently (missing C-wire).
Learning how to replace batteries in Google Nest thermostat ensures that you can keep your home comfortable at all times.
Be sure to practice how to replace batteries in Google Nest thermostat so you are prepared for any battery-related issues.
Charging via USB resolves the immediate problem. The C-wire section below covers the persistent problem.
Always remember how to replace batteries in Google Nest thermostat to keep your system operational without issues.
Remember to frequently review how to replace batteries in Google Nest thermostat to troubleshoot any problems effectively.
How to charge the Nest Learning Thermostat (3rd gen) or Nest Thermostat E via micro-USB
Always be proactive about learning how to replace batteries in Google Nest thermostat to keep your home temperature stable.
- Pull the display off the wall plate. Grip the round display and pull directly away from the wall. It detaches without tools.
- Locate the USB port. On the back of the display, there’s a micro-USB port. You’ll see it labelled or it’s the only port visible.
- Connect a micro-USB cable to a phone charger. Use a standard 5V/1A or 5V/2A USB phone charger — not a fast charger. Plug the micro-USB end into the thermostat port.
- Charge for 30–60 minutes. The display may show a charging indicator. For a fully depleted battery, charge for at least 30 minutes before reattaching.
- Reattach to the wall plate. Align the base connector and press until it clicks. The thermostat will reconnect to Wi-Fi and resume normal operation within a few minutes.
How to charge the Nest Learning Thermostat 4th Gen via USB-C
Following the instructions on how to replace batteries in Google Nest thermostat can enhance your overall experience with the device.
- Pull the display off the wall plate.
- Locate the USB-C port on the back of the display.
- Connect a USB-C cable to a standard phone charger. A 5V/1A charger is sufficient. Avoid fast charging adapters over 18W.
- Charge for 30–60 minutes.
- Reattach to the wall plate.
💡 If the Nest Learning Thermostat needs frequent charging: read this
The Nest Learning Thermostat’s internal battery is designed to stay charged from your HVAC system’s 24V power.
Whether it’s your first time or not, revisit how to replace batteries in Google Nest thermostat for a hassle-free process.
When you think of how to replace batteries in Google Nest thermostat, always remember to handle the device carefully.
If it needs manual USB charging more than once every few months, the thermostat isn’t receiving enough power from the HVAC system.
Common causes: no C-wire, a loose connection at the thermostat or HVAC board, or an HVAC system that can’t deliver enough power on the heating and cooling wires. See the C-wire section below.
How to Check Your Nest Thermostat Battery Status (The Impedance Test)
Before replacing batteries in the Nest Thermostat (2020), run this diagnostic first.
A low battery warning doesn’t always mean the batteries need replacing; sometimes it means they’re poorly seated or the contacts are dirty.
How to check battery impedance on the Nest Thermostat (2020)
- On the thermostat display, press the ring to open the menu.
- Go to Settings → Battery → Battery Status.
- The display shows voltage and impedance for each battery.
- Voltage: healthy AAA alkaline batteries read 1.4–1.6V when new, 1.2–1.3V when depleted.
- Impedance: if impedance is above 1,500mΩ, the batteries need replacing. Below 1,500mΩ, they’re still functional.
If the impedance reads very high but the batteries are new, remove them, clean the contacts with a dry cloth, and reinstall. Sometimes poor contact, not battery depletion, causes the alert.
Nest Thermostat Low Battery Warning That Keeps Coming Back
If you replace the batteries and get another low battery warning within weeks, or if your Nest Learning Thermostat keeps losing charge, the problem is your HVAC system’s power delivery, not the batteries.
Why this happens
All Nest thermostats are designed to draw primary power from your HVAC system via the thermostat wires.
The batteries (or internal rechargeable battery) are backup power only.
Without a C-wire or with a loose one, the thermostat draws from backup power continuously rather than occasionally. Backup power drains fast under continuous load.
Efficiently managing your thermostat includes understanding how to replace batteries in Google Nest thermostat whenever needed.
Check your C-wire connection
Pull the thermostat off the wall plate. Look at the wires connected to the terminals on the wall plate. Find the terminal labelled C. Is a wire connected?
If not, or if the wire is loose, that’s the root cause of your recurring low battery.
For full details on checking and adding a C-wire, see our thermostat C-wire guide. Google’s Nest Power Connector is an alternative; it repurposes an existing wire without new wiring.
Check the wire connections at the HVAC control board
Power delivery issues sometimes come from loose connections at the furnace or air handler rather than at the thermostat. Turn off the HVAC circuit breaker.
Open the furnace access panel. Find the terminal strip where the thermostat wires connect. Confirm each wire is fully inserted and the terminal screw is tightened.
A wire that appears connected but sits loose in the terminal can cause intermittent power issues that drain the thermostat battery.
Nest Temperature Sensor Battery Replacement
If you use a Nest Temperature Sensor in a separate room, it has its own battery that needs replacing independently of the main thermostat.
A low sensor battery causes the sensor to disconnect from the thermostat; you may see “sensor offline,” or the sensor’s temperature readings may disappear from the Google Home app.
What battery does the Nest Temperature Sensor use?
The Nest Temperature Sensor uses one CR2 coin cell battery (3V lithium). This is different from a CR2032; the CR2 is cylindrical, not a flat disc.
Confirm you have a CR2, not a CR2032, before ordering. CR2 batteries are available at most electronics retailers and online.
How to replace the Nest Temperature Sensor battery
- Locate the battery compartment cover on the back of the sensor. There’s a small slot for a coin or flathead screwdriver.
- Twist to open the compartment cover counterclockwise (like a coin battery cover on a key fob).
- Remove the old CR2 battery. Note the orientation — the positive (+) end faces toward the label on most sensors.
- Insert a new CR2 battery with the correct orientation.
- Replace the cover and twist clockwise until it clicks closed.
- Check the Google Home app — the sensor should reconnect within a few minutes. If it doesn’t reconnect automatically, open the app, navigate to the sensor, and run a connectivity check.
How long does the Nest Temperature Sensor battery last?
Google rates the CR2 battery in the Nest Temperature Sensor at approximately 2 years under normal use.
If you’re replacing it more frequently, check that the sensor isn’t in a very cold location; cold temperatures reduce lithium battery capacity significantly.
A sensor in an unheated garage or basement will drain its CR2 faster than one in a living room.
Nest Heat Link Battery Replacement (UK and European Models)
If you’re in the UK or Europe and have a Nest Thermostat E or 3rd-gen Learning Thermostat, your system may include a Nest Heat Link, the separate unit wired directly to your boiler.
⚠️ UK buyers — Nest is no longer sold new in Europe. Google stopped selling new Nest thermostat models in Europe in 2025 and the 4th gen Learning Thermostat was never launched here. If your Heat Link or thermostat needs replacing rather than just a battery, the Nest ecosystem is no longer the right path for UK homes. See our smart thermostat guide for current alternatives, tado° and Drayton Wiser are the leading UK replacements.
The Heat Link has its own batteries that need occasional replacement, independent of the thermostat display.
What batteries does the Nest Heat Link use?
The Nest Heat Link uses two AA batteries. Use only AA Energizer Lithium L91 batteries, not alkaline, not rechargeable.
Google’s documentation explicitly states that alkaline and rechargeable batteries drain very quickly in the Heat Link and need replacement almost immediately.
How to replace Nest Heat Link batteries
- Pull off the fabric cover from the front of the Heat Link.
- Use the battery pull tab to release the old batteries.
- Insert two new AA Energizer Lithium L91 batteries.
- Replace the fabric cover.
Nest Thermostat Battery Troubleshooting — Common Problems
Low battery warning immediately after replacing batteries
Check for a piece of the battery pull tab still attached to the contacts.
Pull the display off the wall, remove the new batteries, and look carefully at each contact for any remaining tab material. Remove it, reinstall the batteries, and reattach.
This causes the majority of “new battery, immediate low battery warning” cases.
The thermostat went blank after a power cut
Power outages drain the backup battery faster than normal operation. For the Nest Thermostat (2020): replace the AAA batteries.
For the Nest Learning Thermostat: charge via USB for 30–60 minutes, then reattach. Once recharged, the thermostat will reconnect to Wi-Fi and resume normal operation.
Future power cuts won’t drain it as fast once the HVAC system is delivering proper power again.
Battery replaced, but thermostat is still offline in the Google Home app
Ultimately, mastering how to replace batteries in Google Nest thermostat allows for seamless home management.
After recharging, the thermostat needs 2–3 minutes to reconnect to Wi-Fi. If it’s still showing offline after 5 minutes, check that your Wi-Fi router is online. The thermostat connects to 2.4GHz Wi-Fi only. If your router was recently changed, reconnect via Settings → Network on the display.
The display turns on but quickly dims or shuts off
This indicates the battery voltage is critically low even with new batteries, or the batteries aren’t making contact properly.
Remove the batteries, clean the contacts with a dry cloth, and reinstall. If the issue persists with confirmed new alkaline batteries, check the Battery Status screen (Settings → Battery → Battery Status) for the voltage reading.
Don’t forget the importance of knowing how to replace batteries in Google Nest thermostat for continuous efficiency.
If voltage shows below 1.2V with new batteries, the contacts may be corroded — clean with a cotton swab dipped in isopropyl alcohol.
Frequently Asked Questions
How do I know if my Nest thermostat needs a new battery?
Your Nest thermostat displays a low battery warning on the screen and sends a notification to the Google Home app when the battery needs attention.
You can also check proactively: on the Nest Thermostat (2020), go to Settings → Battery → Battery Status to see voltage and impedance readings.
A voltage below 1.2V per battery or impedance above 1,500mΩ indicates the batteries need replacing.
Does the Google Nest Learning Thermostat have replaceable batteries?
No, the Nest Learning Thermostat (2nd, 3rd, and 4th generation) and Nest Thermostat E all use internal rechargeable lithium batteries that cannot be user-replaced.
When these models show a low battery warning, charge the display via USB — micro-USB for the 3rd gen and Thermostat E, USB-C for the 4th gen.
Charging takes 30–60 minutes from a standard phone charger.
How long do Nest thermostat batteries last?
The AAA batteries in the Nest Thermostat (2020) last approximately 1–2 years under normal conditions with a properly wired HVAC system.
Without a C-wire, batteries drain in under 6 months, the thermostat draws from backup power continuously when the HVAC can’t deliver sufficient voltage.
If batteries drain faster than every 6 months, investigate your C-wire situation before replacing batteries again.
What batteries does the Nest Thermostat (2020) use?
Two AAA 1.5V alkaline batteries. Use standard alkaline batteries; Duracell CopperTop or Energizer MAX are both confirmed compatible.
Do not use rechargeable NiMH batteries (they deliver 1.2V instead of 1.5V, causing premature low-battery alerts) or lithium AA batteries (wrong chemistry and size).
Why does my Nest thermostat keep saying low battery after I replaced them?
Three common causes. First, a piece of the battery pull tab is still stuck on the contacts.
Remove the batteries and check.
Second, the batteries aren’t alkaline; rechargeable NiMH batteries trigger false low-battery alerts due to lower voltage.
Third, and most common for persistent drain: your HVAC system isn’t delivering a C-wire power signal, so the thermostat draws continuously from the backup batteries rather than occasionally.
See our C-wire guide for the diagnosis and fix.
Final Verdict — What to Do with Your Nest Thermostat Battery Right Now
✅ You have a Nest Thermostat (2020): square, rounded corners
Replace the batteries. Pull the display off the wall. Remove the two AAA batteries from the back of the display. Insert two fresh AAA alkaline batteries, Duracell or Energizer, not rechargeable. Reattach. Done in under two minutes.
If low battery warnings keep returning after replacement, the root cause is your C-wire — not the batteries. See our C-wire guide.
✅ You have a Nest Learning Thermostat 4th Gen (2024): round, metal ring, USB-C
Charge via USB-C. Pull the display off the wall. Connect a USB-C cable from the port on the back to a standard phone charger. Charge for 30–60 minutes. Reattach. There are no replaceable batteries in this model.
If it needs charging repeatedly, add a C-wire or install the Nest Power Connector.
✅ You have a Nest Learning Thermostat 3rd Gen or Nest Thermostat E: round, micro-USB
Charge via micro-USB. Pull the display off the wall. Connect a micro-USB cable to a standard phone charger. Charge for 30–60 minutes. Reattach. No replaceable batteries exist on these models.
Repeated charging needs = C-wire issue. Check the connection at the thermostat and at the furnace control board.
❌ You have a Nest Learning Thermostat 1st or 2nd Gen
Charging the battery will not restore smart features. Google ended app support for these models on October 25, 2025. The thermostat still works manually; you can adjust the temperature on the device, but app control, voice control, and remote access will not return regardless of battery charge.
If you want smart thermostat features back, the Nest Learning Thermostat 4th Gen is the direct upgrade. See our best smart thermostats guide for all current options, including Ecobee and Honeywell alternatives.